The 5-Step Wine Tasting Method is an ordered sensory framework: See, Swirl, Smell, Sip, and Savor. It separates appearance, aroma, palate structure, and finish so you can describe evidence before deciding whether a wine is enjoyable or well made.
Wine tasting is a skill, not a gift. This guide explains controlled preparation, the five sensory actions, aroma-layer analysis, acidity and tannin assessment, finish measurement, a practical tasting grid, common misreadings, and side-by-side exercises. The sequence aligns with the logic of WSET’s Systematic Approach to Tasting and Wine Folly’s Five S’s framework, although those systems use different terminology and scoring detail.
What Is the 5-Step Wine Tasting Method?
The 5-Step Wine Tasting Method is a repeatable progression from visual observation to overall sensory judgment. The five actions cover sight, smell, taste, texture, structure, balance, and aftertaste:
- See: inspect color, clarity, brightness, depth, and visible development.
- Swirl: move the wine through the glass to observe viscosity and introduce oxygen.
- Smell: identify aromatic families, intensity, condition, and development.
- Sip: evaluate flavor, sweetness, acidity, tannin, alcohol, body, and mouthfeel.
- Savor: assess the finish, persistence, balance, and final impression.
Some guides use sniff instead of smell, and some call the final action savour. The terminology changes; the sensory logic remains stable. Why rush directly to the sip when the glass has already offered clues about the wine’s condition and style?
How does this method differ from professional tasting systems?
The five-step sequence gives beginners a memorable path through the glass, while WSET’s Systematic Approach to Tasting expands the same observations into appearance, nose, palate, structure, balance, quality, and readiness for drinking. Wine Folly’s Five S’s framework presents the method in accessible language. A professional tasting grid may require more precise judgments about intensity, development, concentration, and persistence; a home tasting can use the same categories without turning the experience into an exam.
The method also follows sensory-evaluation principles associated with UC Davis: keep service conditions consistent, record observations systematically, and reduce distractions when comparing samples. That approach separates description—“medium acidity, red berry, firm tannin”—from preference—“I like it.” Both responses have value, but they answer different questions.
Prepare for the Five-Step Wine Tasting Method: Glassware, Temperature, Order, and Etiquette
Preparation improves comparison by controlling variables before the wine reaches your palate. Use clean neutral glassware, consistent pours, suitable serving temperatures, a logical tasting order, and a neutral environment.
How should you hold, pour, and serve wine before tasting?
Hold a stemmed glass by the stem or foot. That grip avoids warming the bowl with your hand and keeps fingerprints away from the area you need to inspect. Pour to roughly the widest point of the bowl rather than filling the glass to the rim. The empty space above the wine creates an aroma chamber where volatile compounds can collect after swirling.
Use the same glass shape and pour size for every wine in a comparison. A large bowl can make one sample appear more aromatic than a small glass, while a heavy pour leaves less headspace and makes swirling awkward. For a three-wine flight, equal pours offer a cleaner comparison than generous, inconsistent servings.
Serve wine according to its style rather than relying on the broad labels “red” and “white.” WSET Level 3 guidance places many sparkling and light white wines around 6–10°C, fuller whites around 10–14°C, and many reds around 15–18°C. Excessive warmth can emphasize alcohol; excessive chill can mute aroma and make structure feel harder. Record the actual service condition if a comparison is formal.
What tasting order works best?
A useful order moves from delicate and dry wines toward fuller, sweeter, more tannic, or more heavily oaked wines. This progression reduces the chance that an intense sample will overwhelm a more subtle wine that follows.
- Lower aromatic intensity before higher intensity.
- Dry wines before sweet wines.
- Lower tannin before higher tannin.
- Younger wines before more developed wines.
- Cooler, lighter styles before warmer, fuller styles.
Compare three wines made from the same grape at different prices, climates, or production styles. One controlled variable creates a sharper learning exercise than a random collection of bottles.
When should you spit wine?
Spit when you are comparing several wines, studying structure, or tasting for an extended period. A covered spittoon lets you evaluate alcohol, tannin, and finish without allowing every sample to accumulate. Lean close to the spittoon and expel the wine with controlled pressure.
Drink still water between samples. Plain bread or unsalted crackers can reset the palate when needed, but strongly flavored food, coffee, sweets, perfume, smoke, and scented candles compete with the wine. Spitting does not remove every sensation: the finish can still be assessed through lingering flavor, aroma, acidity, and tannin.
See, Swirl, Smell: The First Three Steps for Appearance and Aroma
See, Swirl, and Smell establish the wine’s visual condition, aromatic intensity, and likely flavor direction before the palate confirms or challenges those clues. Use a well-lit room and a clean white or light-colored background.
See: How do you assess color and clarity?
Hold the glass against a white napkin, sheet of paper, or tablecloth. Tilt it slightly and inspect the center, edge, and rim. Record observations before interpreting them:
- Clarity: clear, hazy, cloudy, or brilliant.
- Brightness: vivid, dull, reflective, or muted.
- Hue: purple, ruby, garnet, brick, straw, lemon, gold, amber, or brown.
- Color intensity: pale, medium, or deep.
- Rim variation: whether the edge differs from the center.
Appearance can suggest grape characteristics, extraction, age, filtration, or oxidation, but it cannot prove any of them alone. A young red may show purple or ruby tones; an older red may develop garnet or brick at the rim. Whites can move from pale straw toward gold or amber as style, production, and development change. A cloudy wine may be deliberately unfiltered or may show a fault, so the nose and palate must test the visual clue.
Should you use color to judge wine quality?
No—color describes appearance, not quality. Deep color does not guarantee concentration, complexity, or balance, and a pale wine can still show precision and persistence. Treat color as the first piece of evidence in a larger pattern.
Swirl: Why does movement release wine aromas?
Swirling increases the wine’s contact with air and helps aromatic compounds move into the headspace above the liquid. Set the base on a flat surface and make a small circular motion for several seconds. Beginners often swirl too vigorously; a controlled movement releases aroma without splashing the bowl or losing the sample.
Hold the glass by the stem or base, then smell before and after swirling. The second observation may reveal fruit, flowers, herbs, spice, oak, fermentation, or earthy notes that were less apparent at rest. Sparkling wine requires a gentler approach because aggressive agitation can release carbon dioxide more quickly.
What do legs or tears reveal?
Legs or tears show how liquid drains down the glass; they do not provide a precise alcohol reading or a quality score. Alcohol, residual sugar, temperature, glass cleanliness, surface tension, and viscosity influence the streaks. Thick, slow-moving legs may accompany higher alcohol or sugar, but the pattern should remain a descriptive observation rather than a verdict.
Smell: How should you evaluate a wine’s aroma?
Smell with two or three short sniffs instead of one long inhalation. Short pauses reduce nasal fatigue and help you notice changes between the undisturbed wine and the swirled wine. Keep the glass near, rather than pressed against, your nose; excessive alcohol vapors can dominate the first impression.
Move from broad categories to precise references:
- Fruit: citrus, green apple, pear, peach, red berry, black fruit, tropical fruit, or dried fruit.
- Floral: rose, violet, orange blossom, or honeysuckle.
- Herbal and vegetal: mint, dried herbs, bell pepper, tomato leaf, or tea.
- Spice: black pepper, clove, baking spice, anise, or ginger.
- Wood and smoke: vanilla, toast, cedar, tobacco, char, or smoke.
- Earth and mineral: mushroom, forest floor, wet stone, chalk, or flint as sensory associations.
These descriptions refer to perceived similarities, not necessarily literal ingredients. A wine that smells like vanilla does not need vanilla added to it; oak and fermentation chemistry can create familiar associations.
What are primary, secondary, and tertiary aromas?
Primary aromas relate mainly to grape and growing-site character, secondary aromas to fermentation and winemaking, and tertiary aromas to maturation. The categories overlap, so use them as an organizing tool rather than a rigid chemical map.
| Aroma layer | Typical source | Examples |
|---|---|---|
| Primary | Grape and vineyard | Fresh fruit, flowers, herbs, green or black fruit |
| Secondary | Fermentation and cellar work | Yeast, bread, cream, butter, toast, or oak |
| Tertiary | Barrel or bottle development | Dried fruit, leather, tobacco, mushroom, nuts, or forest floor |
Ask yourself: does the aroma feel fresh, cooked, dried, fermented, toasted, or developed? That question often produces a more useful note than chasing an obscure individual descriptor.
Sip: Evaluate Flavor, Texture, Balance, Acidity, Sweetness, Tannin, and Body
Sipping tests the wine’s palate structure and shows whether the flavor confirms what the nose suggested. Take a small but meaningful sip, move it across the tongue and cheeks, and notice the entry, mid-palate, and exit.
- Entry: note sweetness, acidity, temperature, and first flavor impression.
- Mid-palate: assess concentration, body, texture, tannin, and flavor development.
- Exit: observe alcohol warmth, dryness, bitterness, persistence, and balance.
You can draw a small amount of air through the wine to amplify retronasal aroma, but avoid theatrical slurping. The goal is clearer perception, not performance.
What do the main palate components feel like?
Acidity creates freshness, sweetness creates perceived softness or richness, tannin creates grip, alcohol creates warmth, and body describes overall palate weight. Record each element separately before judging how they interact.
| Component | Perceived effect | Useful note |
|---|---|---|
| Acidity | Salivation, tartness, freshness | Low, medium, or high; crisp or sharp |
| Sweetness | Residual sugar or sweet impression | Dry, off-dry, medium, or sweet |
| Tannin | Grip and drying on gums | Fine, coarse, firm, soft, or drying |
| Alcohol | Warmth and weight | Integrated or hot |
| Body | Overall sense of weight | Light, medium, or full |
| Texture | Tactile character | Silky, creamy, chalky, lean, or coarse |
Do not confuse aromatic intensity with body. A light-bodied wine can smell intensely of flowers or fruit, while a full-bodied wine can show restrained aromatics. Balance asks whether acidity, sweetness, tannin, alcohol, fruit, and oak support one another or compete.
How can you assess balance?
A balanced wine feels proportionate because no single component dominates the finish or mid-palate. High acidity can feel refreshing when fruit and sweetness support it; high alcohol can feel integrated when concentration and acidity carry the warmth. High tannin can suit a structured red when fruit and body provide enough substance.
Try this prompt: What sensation arrives first, and what remains after everything else fades? That answer often reveals whether the wine feels harmonious, angular, hot, thin, sweet, or drying.
Savor: Judge the Finish, Persistence, and Wine Development
Savor focuses on the sensations that remain after swallowing or spitting. A finish includes lingering flavor, aroma, acidity, tannin, bitterness, warmth, and texture; length alone does not decide quality.
What is a wine finish?
A wine’s finish is the duration and character of its aftertaste. Count from the moment the wine leaves your mouth until identifiable flavor and structure fade. Record both length and character:
- Short: flavor disappears quickly.
- Medium: recognizable flavor remains for a noticeable interval.
- Long: clear flavor and structure persist well after the sip.
- Clean: the aftertaste remains distinct without a distracting fault.
- Unbalanced: alcohol, acidity, tannin, sweetness, bitterness, or oak dominates.
A long finish can be long and harsh. A short finish can suit a delicate, refreshing style. Judge persistence alongside intensity, complexity, balance, and condition.
Why does wine seem to change after swallowing?
Retronasal aroma can continue after the liquid has gone, making fruit, spice, oak, or earthy notes appear to rise from the back of the mouth. Swallowing can also make alcohol warmth more noticeable. When tasting several wines, spitting still leaves enough aromatic and structural information to evaluate the finish.
Notice the final movement: does the wine become fresher, drier, warmer, more bitter, more aromatic, or flatter? Write that change down instead of replacing it with a general label such as “smooth.”
Record the Five Steps: A Beginner Wine-Tasting Notes Template and Scoring Grid
A tasting sheet converts fleeting impressions into evidence that you can compare later. Write what you perceive first, then add an interpretation or quality judgment.
What should you record at each step?
- See: clarity, brightness, hue, intensity, rim variation, and visible movement.
- Swirl: viscosity, legs or tears, bubble persistence, and aroma release.
- Smell: intensity, fruit condition, aroma families, oak, fermentation, faults, and development.
- Sip: sweetness, acidity, tannin, alcohol, body, texture, flavor intensity, and balance.
- Savor: finish length, recurring flavors, warmth, bitterness, dryness, and final balance.
“Red berry, medium intensity, medium acidity” gives another taster usable information. “Good red wine” records a preference but no sensory evidence.
How can a 1-to-5 grid support comparisons?
A simple five-point grid creates a repeatable personal benchmark without pretending to replace a professional certification scale. Score immediately after tasting, then revisit the sheet five minutes later to see which impressions persist.
| Category | 1 point | 3 points | 5 points |
|---|---|---|---|
| Appearance | Hazy or inconsistent | Clear and typical | Clear, vivid, distinctive |
| Aroma | Weak, faulty, or unclear | Clear and moderate | Intense, complex, clean |
| Structure | Thin or harsh | Recognizable and moderate | Layered and integrated |
| Balance | One element dominates | Mostly proportionate | Components support one another |
| Finish | Very short or distracting | Moderate and clean | Persistent, clear, balanced |
Use the score as a conversation aid, not an objective truth. Your second score may differ because expectation, food, temperature, fatigue, and context influence sensory judgment.
Five-Step Wine Tasting Pitfalls: Common Misreadings and Beginner Mistakes
The common errors involve treating a clue as proof. Color cannot identify a grape on its own, legs cannot measure alcohol precisely, and a long finish cannot guarantee quality.
Which clues do tasters commonly overinterpret?
- Deep color: may reflect grape pigment, extraction, age, or production style rather than quality.
- Cloudiness: may signal a fault or deliberate minimal filtration.
- Legs: reflect flow conditions involving alcohol, sugar, temperature, and surface tension.
- Acidity: indicates freshness and structure, not a guaranteed alcohol level.
- Tannin: describes grip and dryness, not age by itself.
- Long finish: indicates persistence, but the remaining flavor may be bitter, hot, or unbalanced.
What distorts a tasting?
External odors, dirty glassware, incorrect temperature, inconsistent pours, and rushed handling can distort the result before the first sip.
- Perfume, smoke, scented candles, and cooking aromas compete with wine aroma.
- Detergent, grease, dust, or residual wine in a glass creates false notes.
- Over-chilling suppresses aroma and emphasizes firmness; excessive warmth emphasizes alcohol.
- Unequal pours and different glass shapes make comparisons less reliable.
- Rapid swallowing leaves too little time to measure the finish.
If one sample seems faulty, smell the empty glass and compare it with a clean glass. That quick check can distinguish a glass problem from a wine problem.
What if you cannot identify an aroma?
Use the broadest accurate descriptor instead of inventing a precise answer. Try this three-stage fallback:
- Name the family: fruit, floral, herbal, spice, earth, oak, or fermentation.
- Describe the condition: fresh, dried, cooked, sweet, savory, dusty, or smoky.
- Add a familiar reference only after recording the initial impression.
“Unidentified but clearly herbal” communicates more than a confident guess that does not match the sensation. Repeated exposure to reference aromas, grape varieties, and styles gradually builds a more precise vocabulary.
Wine Decanting and Other Edge Cases in a Five-Step Tasting
Decanting changes the sample’s exposure to oxygen and can affect how aromas and structure appear during the five steps. Decide whether you are decanting to separate sediment, open a young wine, or create a controlled comparison.
Read Decanted for the distinction between decanting as a tasting intervention and decanting for service. A split sample—half served directly and half decanted—creates a useful experiment: compare color, aroma intensity, tannin texture, and finish while keeping the bottle constant.
For a young red, a short aeration period can change aroma expression; for an older wine, prolonged exposure can cause delicate aromas to fade. The Northwest Wine Report discusses decanting more wines in 2026, while SevenFifty Daily reported in its cited study that open-glass exposure was associated with a loss of 1% alcohol by volume over two hours and up to 3.2% over six hours, demonstrating why time and exposure should be recorded during experiments.
For a detailed distinction between opening a wine for analysis and preparing it for immediate enjoyment, see Wine Decanting for Tasting Purposes Decanting. Sparkling wine, fragile mature wine, natural wine, and heavily reduced wine may each respond differently to agitation, oxygen, and time.
Next Step: Build Palate Confidence Through Repeated Five-Step Wine Comparisons
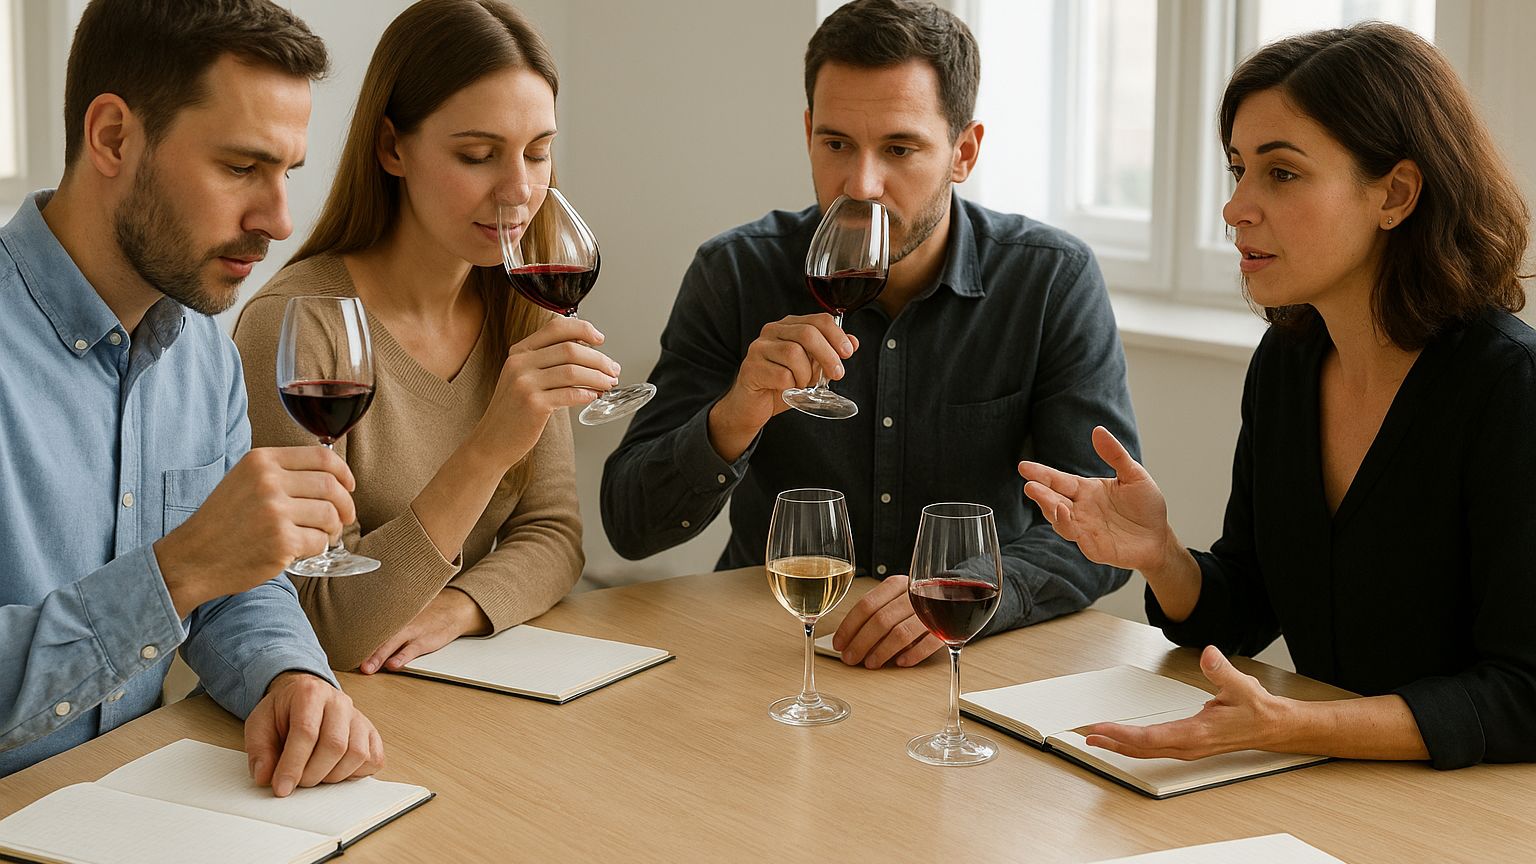
Repeated, controlled comparison builds sensory memory more effectively than relying on a single memorable bottle. Keep the glassware, pour size, lighting, temperature, and tasting order consistent. Hide the labels when you want to reduce expectation, then reveal them after writing your observations.
Which comparisons produce the clearest learning?
Choose wines that differ in one meaningful dimension. A focused comparison makes the palate answer a question instead of sorting through noise.
| Comparison | Question | Evidence to track |
|---|---|---|
| Cool-climate and warm-climate Chardonnay | How do ripeness and acidity alter balance? | Citrus, stone fruit, acidity, alcohol, finish |
| Pinot Noir and Cabernet Sauvignon | How does tannin change texture? | Color, fruit character, grip, body, persistence |
| Unoaked and oaked white wine | How does wood affect aroma and mouthfeel? | Fruit, toast, creaminess, body, aftertaste |
| Young and mature red wine | How do primary and tertiary aromas coexist? | Fresh fruit, dried notes, tannin, complexity, finish |
How do you run a two-wine blind tasting?
- Choose two or three wines with one clear comparison.
- Use identical clean glasses and equal pours.
- Serve the samples at comparable temperatures.
- Complete See, Swirl, Smell, Sip, and Savor notes before discussion.
- Score appearance, aroma, structure, balance, and finish.
- Reveal the labels and connect the sensory patterns to grape, climate, production, or age.
Open-label tasting still has a role: once you have recorded an unbiased first impression, the label can connect a sensory pattern with a region or winemaking choice. Blind and open formats answer different questions.
When the comparison turns toward oxygen exposure, use Wine Decanting as the next advanced variable: taste the same wine directly from the bottle, after a controlled decant, and again after a measured rest while tracking aroma, tannin, balance, and finish.